Embossed Leather Look with Wall Art Stencils
Create the classic look of sumptuous embossed leather on walls, furniture, cabinets and panels. A custom Modello® stencil in a Reverse Image makes it easy to get the look with metallic plaster, stain, and wax. 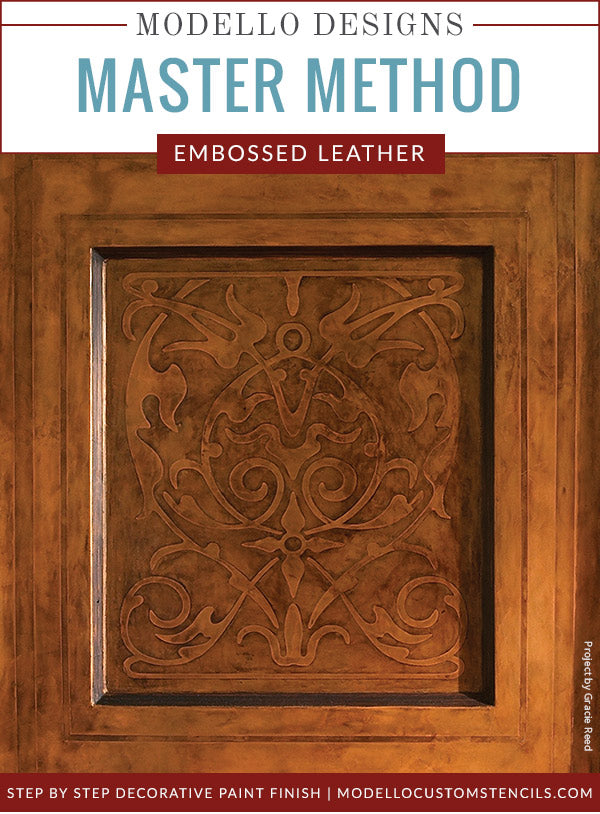
- Choose from our Custom Stencil Collection. Select (Reverse/Negative Weed) under Stencil Image Options. Contact Modello® Stencils customer service to order this design.
Faux Effects International® Products: Order via our Affiliate Link Here
- Lusterstone: Charred Olive, Brown Suede, Terra Cotta
- Aquacreme
Tools and Materials: Order via Royal Design Studio Here
- Liberon Wax: Medium Oak
- Venetian Trowel
- Soft Rubber Trowel
- 600-Grit Wet/Dry Sandpaper
- Terry Towel
- Spray Bottle
- Cheesecloth
- Lambswool
Basecoat:
- Black Aquabond
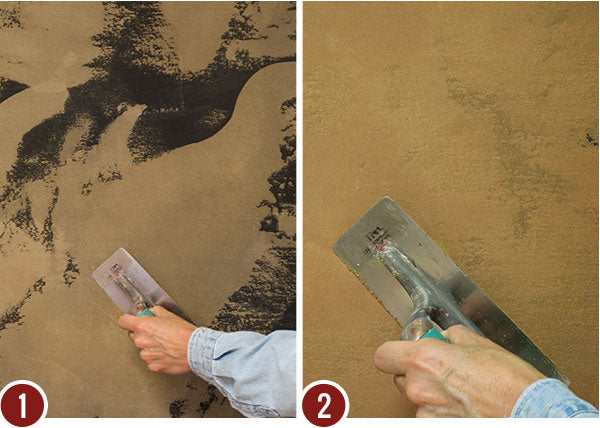
Step 1: Use a Venetian trowel to trowel on a skim coat of Charred Olive Lusterstone over the Black basecoat. It is OK (and preferable) to leave about 10-15% open areas of Black showing through in irregular patches. Keep the trowel fairly “flat” (low angle to the surface) and alter the direction of your strokes. Let dry.
Step 2: Trowel on a slight “texture” coat of Brown Suede Lusterstone. In this case “texture” refers to subtle high/low areas of material with irregular edges. This subtle texture will become highlighted and more pronounced in subsequent layers. Let dry.
Burnishing Tip: To bring up more shine and add a smoother feel to the Lusterstone, use a clean Venetian Trowel to “burnish” the layers between coats. This will help to compress the material and you will immediately be able to see and feel the difference.
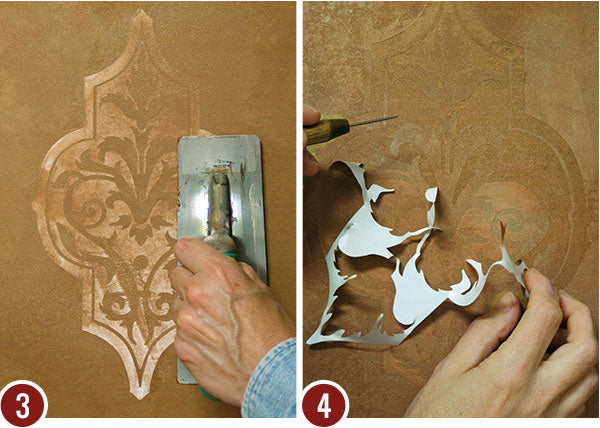
Step 3: Apply your Modello® patterns in a random arrangement over the wall surface. Working “wet-on-wet”, first trowel on Brown Suede Lusterstone in a small area. Immediately go back and layer and blend in some Terra Cotta. You can blend and layer colors until you get your desired results.
Step 4: You will want to build up the material as thickly as possible over the Modello® patterns, while still being able to see the pattern ghosting through for easy removal. Do not remove the Modello® patterns (shown here) until the Lusterstone layers have completely dried. This may take several hours or even overnight.
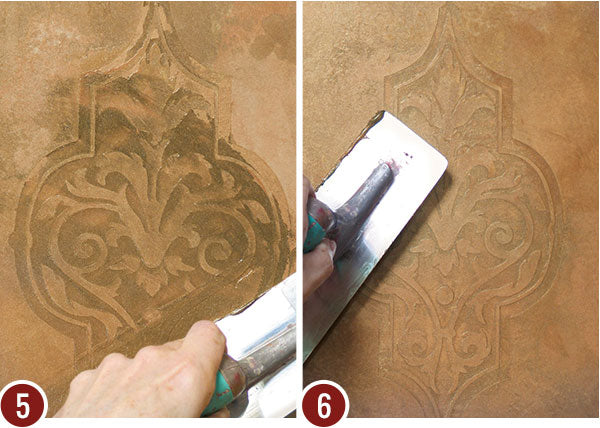
Step 5: Thin both the Charred Olive and Brown Suede Lusterstone colors with about 10%-15% Aquacreme to increase translucency and working time. Trowel in small, workable areas first with the Charred Olive, pushing it hard into the recessed areas around the design left by the (now removed) Modello patterns.
Step 6: Immediately go back over and blend with the Brown Suede Lusterstone. Of course, if a more dramatic effect is desired, you can just leave more Charred Olive in the recessed areas. Let dry.
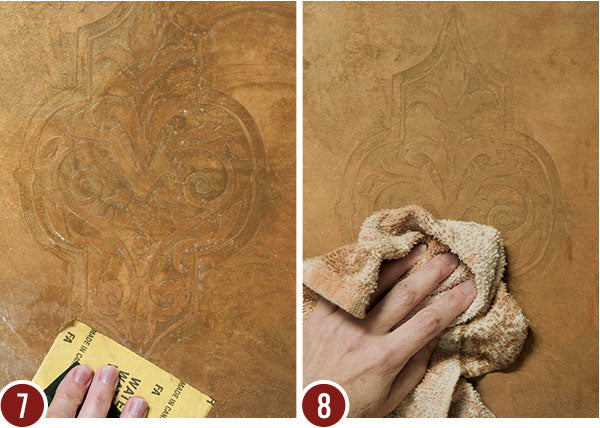
Step 7: Wet-sanding with 600-grit wet/dry sandpaper will give the surface a beautiful surface shine and feel. Lightly spritz the area you are working in with water and immediately rub over it lightly with the sandpaper.
Step 8: Have a clean terry towel handy to immediately wipe the surface clean as you work. Otherwise you may end up with “dry lines” in the finish.
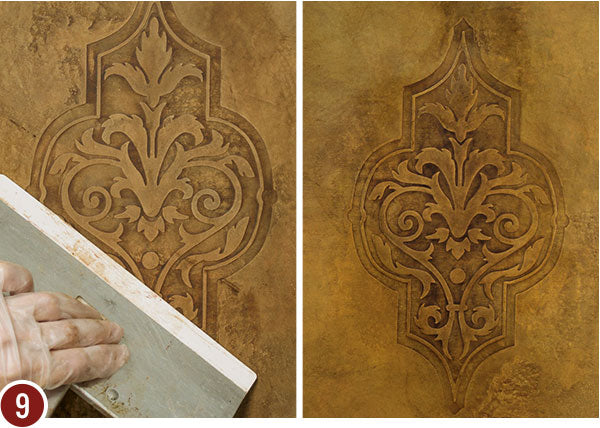
Step 9: Load a Soft Rubber Trowel with Medium Oak wax and trowel thinly over the entire surface. The wax will catch beautifully in any slightly recessed area and dramatically enhance the texture of the finish and designs. To make the embossed design more pronounced, let the first layer of wax dry and add additional wax in those areas. Let dry.
To Finish: Let the final layer of wax dry and burnish to a soft sheen with cheesecloth, a lambswool mitt or a mechanical car buffer.
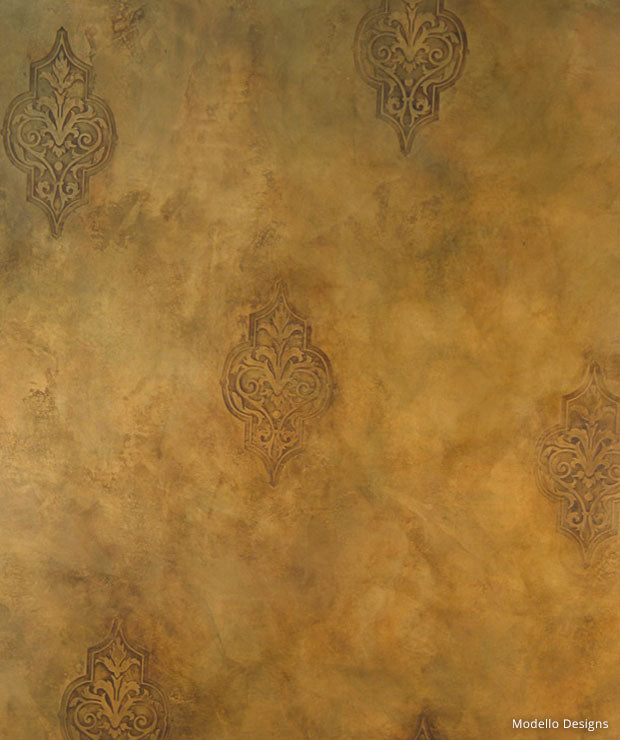
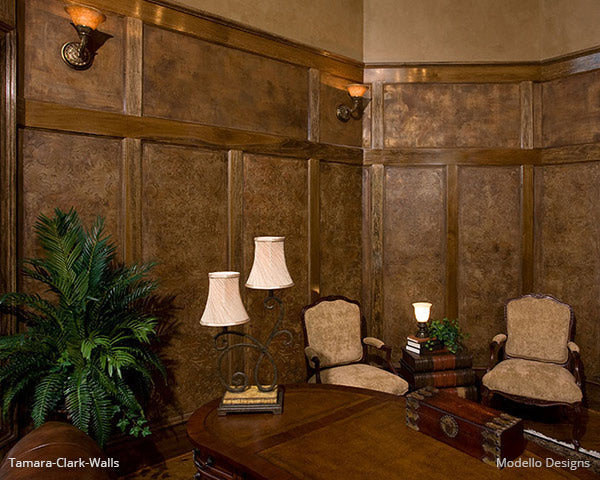
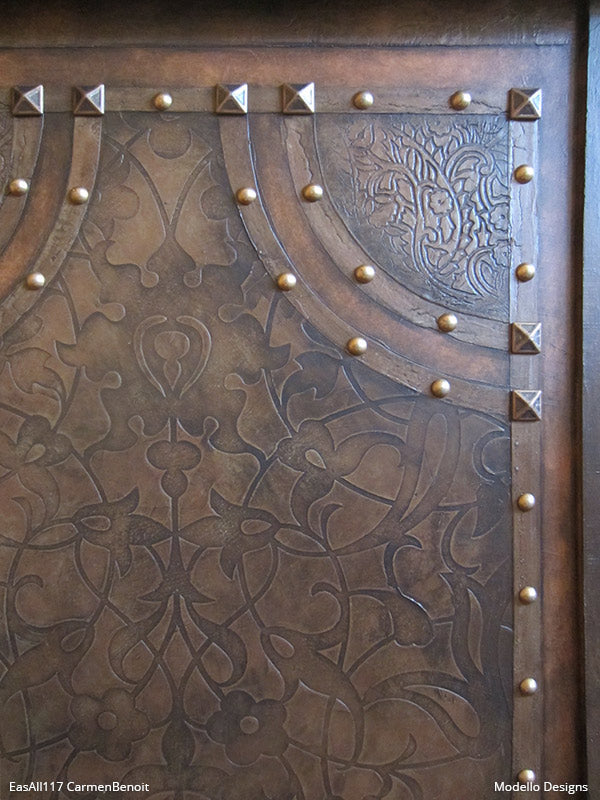
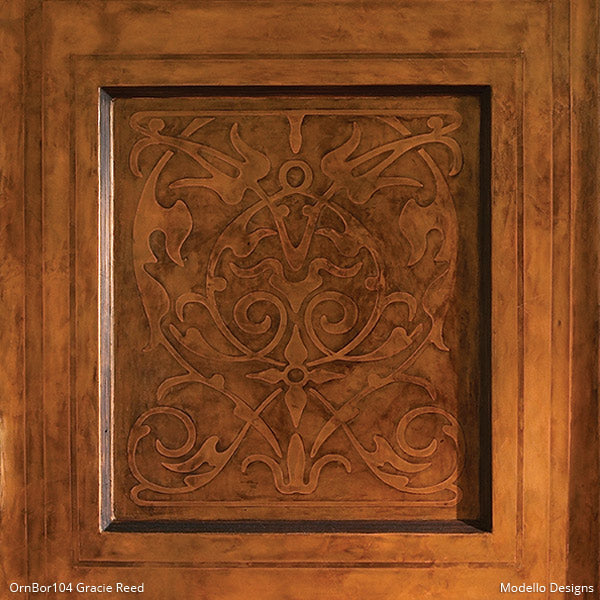
More inspiration: Tamara Clark, Carmen Benoit, and Gracie Reed did a beautiful job using this technique with our custom Modello® Stencils below.
