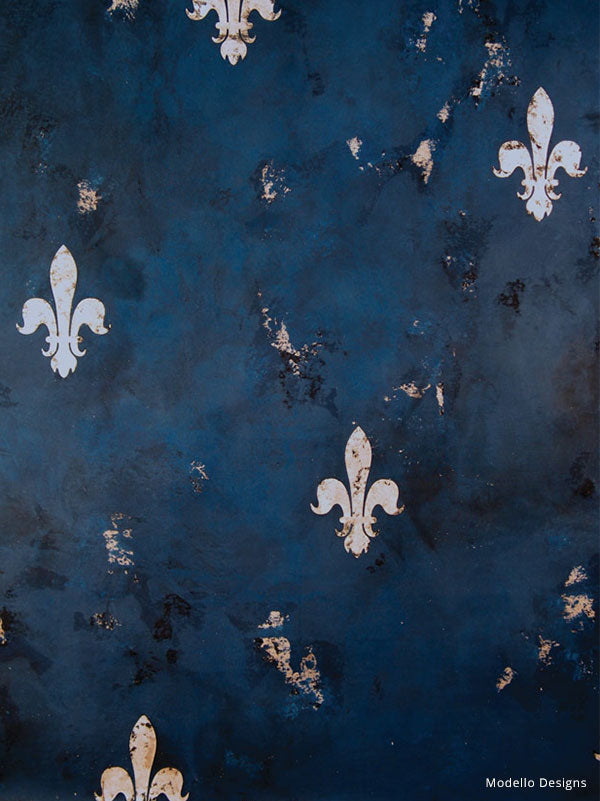
Midnight Blue & Silver Wall Finish
Distressed silver leaf stencil motifs shine brightly on a midnight blue plaster background.
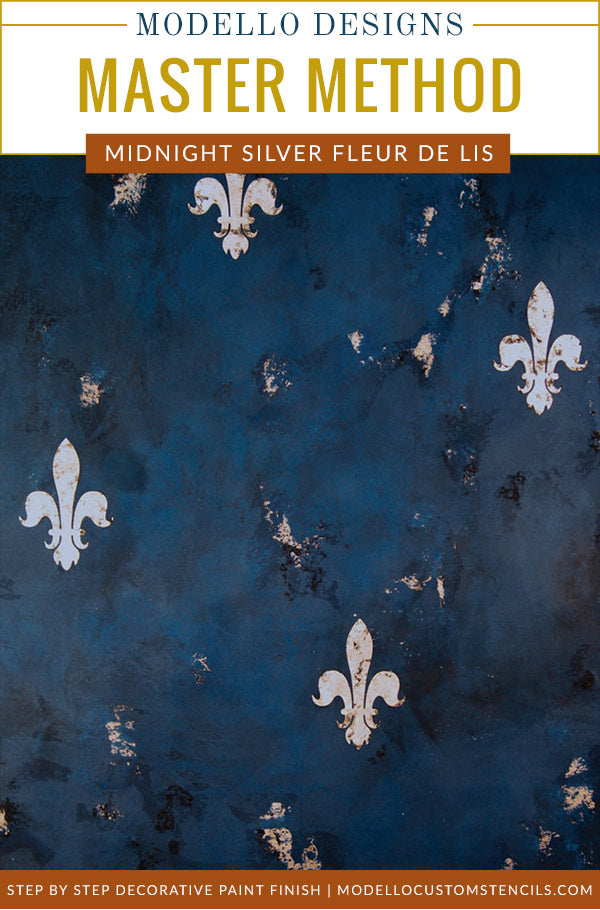
- Modello Pronto! Fleur de : Contact Modello® Stencils customer service to order this design.
Faux Effects International® Products: Order via our Affiliate Link Here
- Lusterstone: Cobalt Blue, Snowflake White
- Aluminum Leaf (in books or loose Schabin leaf)
- Rolco Aquasize (or similar water-based size for leaf)
- Stain and Seal: Van Dyke Brown
- Aquacreme
- Aqua Extender
Tools and Materials: Order via Royal Design Studio Here
- Sea Sponge
- Soft Rubber Trowel
- Venetian Trowel
- Japan Scrapers
- Foam Brush
Basecoat: Black Aquabond
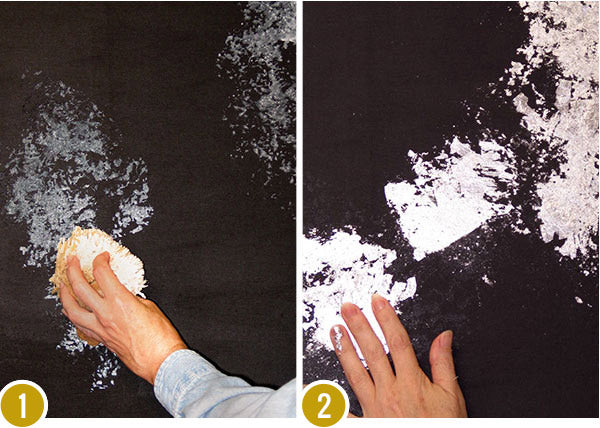
Step 1: Use a damp sea sponge to randomly sponge on irregular areas of water-based size over your surface. Allow to come “to tack”, which should take about 15-20 minutes.
Step 2: Remove individual sheets of aluminum leaf from a “book” or use sheets of loose Schaibin leaf to apply to the areas of sponged-on size. The leaf will only stick in those areas that contain the size. Burnish the leaf into the surface and remove the loose excess by rubbing gently with the flat of your hand or soft cotton batting.
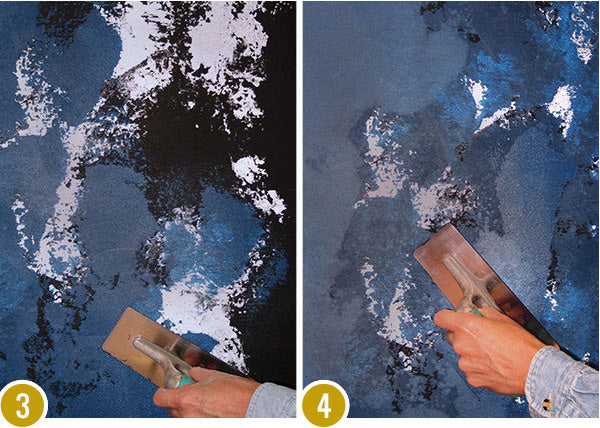
Step 3: Trowel on Cobalt Blue Lusterstone in a thin skim/skip coat. Change the direction of your hand and pressure on the trowel often to achieve irregular “edges” Purposely leave both some of aluminum leafed areas and black background showing. Let dry.
Step 4: Add about 20% Snowflake White to some Cobalt Blue and then thin that mixture slightly by adding about 10% Aquacreme. Trowel a skim coat over the first layer of Cobalt Blue, covering more of the exposed leaf and black background while creating more subtle texture and value changes. Let dry.
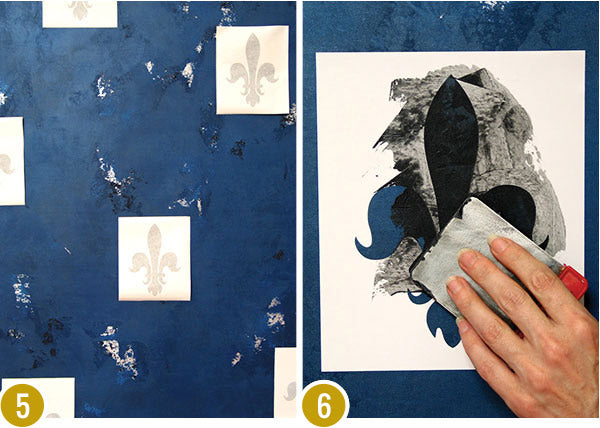
Step 5: Place Modello® stencils in either a random or formal grid pattern. Here the backing paper has been removed and the patterns applied lightly to the surface without pressure. At this point they can still be moved around and adjusted. Be sure that the designs are level!
Pro Tip: On slightly textured surfaces such as Lusterstone, it is possible to move and reposition the Modello® stencils once the Backing Paper is removed as long as they are just applied lightly to the surface and not burnished. This is NOT possible, however on a smooth or painted surface as the Modello® stencil's adhesive will “grab” onto those surfaces more strongly.
Step 6: Trowel through the Modello® stencils with a thin coat of Ebony Frost Lusterstone, just flush with the thickness of the Modello® stencil. Let dry completely.
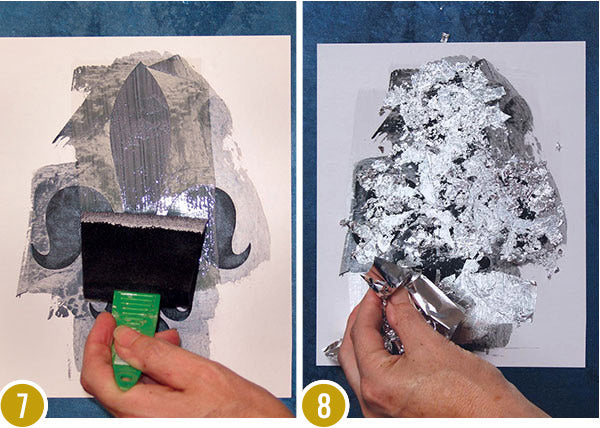
Step 7: Brush a thin coat of water-based size. Again, allow to come “to tack” for about 15-20 minutes.
Step 8: Apply the aluminum leaf again in a “broken leaf” method, scrunching it up in your hand and just dabbing onto the surface. If desired, allow some of the black background to show through.
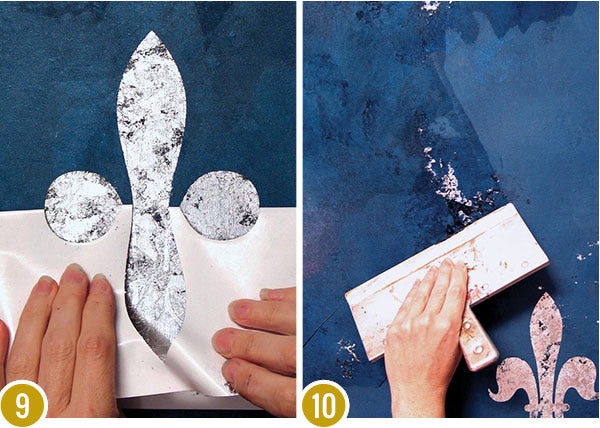
Step 9: Burnish gently again to remove the excess leaf and ensure a crisp image when the Modello® stencil is removed. Allowing the size to dry overnight before burnishing and removing the Modello® stencil is actually preferable-but sometimes not practical.
Step 10: Create a deep brown glaze by mixing 80% Aquacreme and 20% Van Dyke Brown Stain and Seal. To that mixture add about 10% Aqua Extender to create more open time. Use a soft rubber trowel to trowel the glaze over the surface, highlighting the texture and design areas.
